Stop the Bleed Tourniquets are the emergency tool that can turn a fatal bleed into a survivable situation. In survival scenarios – accidents in the wild, car crashes, or any trauma where blood is pumping out fast – a tourniquet steps in when nothing else works.
It’s a simple concept: squeeze the limb hard enough to cut off blood flow below the device. But get it wrong, and you risk more damage. Used by soldiers, hikers, and first responders, tourniquets have saved countless lives since ancient times.
They’re not for every cut – only the big, life-threatening ones. Let’s break down what they do, why they’re critical, how to use them properly, and your DIY options when you’re miles from a med kit. This isn’t medical advice – consult pros and get trained. But knowledge here could be the difference.
WHAT IS A TOURNIQUET?
A tourniquet is a constricting band or device applied to a limb to control severe bleeding by compressing blood vessels.
Common Names: TQ, Combat Tourniquet, Stop-Bleed Device
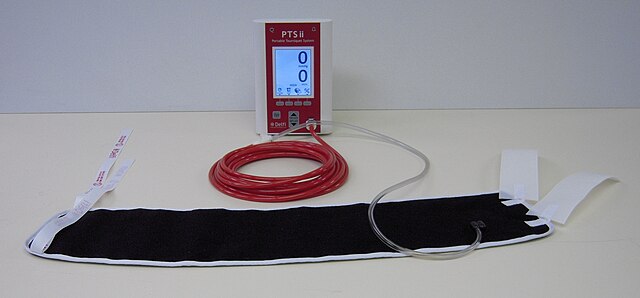
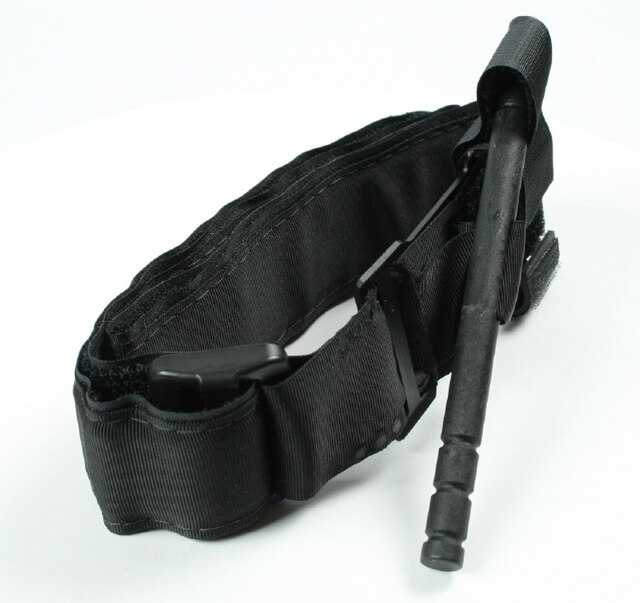
Types: Commercial (pre-made like CAT or SOF-T) or Improvised (DIY from everyday items)
What It Does:
- Occludes (blocks) arteries and veins to stop blood flow distal (below) to the application site.
- Prevents massive blood loss, which can lead to shock or death in minutes.
- Buys time for evacuation or professional help.
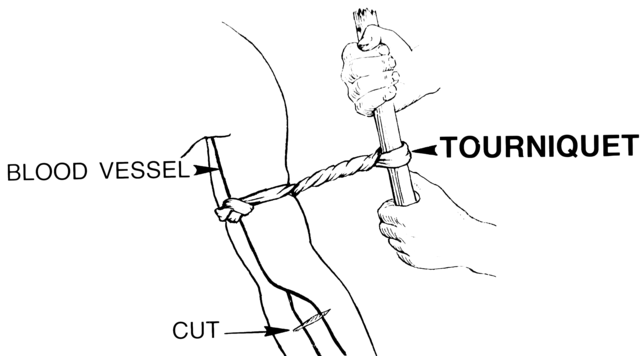
The Signature: A wide strap or band (at least 2 inches wide) with a mechanism to tighten it extremely – often a windlass (twisting rod). Narrow or weak materials fail and can cause more harm.
WHEN TO USE A TOURNIQUET
Only for life-threatening bleeding on arms or legs – think bright red, spurting blood that soaks through bandages fast. An adult can bleed out 40% of their blood in 3-4 minutes.
Why Use It:
- Direct pressure (pressing hard on the wound with gauze or cloth) is first line – try that for 10-15 minutes.
- If bleeding doesn’t stop, elevate the limb if possible, but don’t rely on it alone (old myth: elevation isn’t as effective as once thought).
- TQ is the escalation: it saves lives when pressure fails, especially in remote or survival situations.
- Modern research (from military data) shows TQs don’t increase amputation risk if removed within 2 hours – the real risk is bleeding out.
Quick Tests:
- Is blood pulsing or squirting? Arterial bleed – TQ candidate.
- Limb only? (Never use on neck, torso, or head – direct pressure only.)
- Uncontrollable? Proceed.
See full guide: Stop the Bleed Campaign resources.
WHY IT WORKS (AND WHY IT’S CONTROVERSIAL)
Tourniquets fell out of favor in the past due to fears of limb loss, but Vietnam and Iraq wars proved they’re lifesavers when used right.
How It Works:
- Compresses the limb to crush blood vessels closed.
- Stops flow to the wound site, allowing clotting elsewhere.
- Painful as hell – warns the user it’s working (no pulse below TQ means success).
Ecological Role in Survival:
- Stabilizes the victim for transport.
- Prevents shock (cold, clammy skin, rapid pulse).
- Part of the “golden hour” – get help fast.
Historical Marker:
Ancient Romans used them in battle; modern versions like the CAT (Combat Application Tourniquet) are standard in military kits. Famous Example: Boston Marathon bombing survivors – civilian TQs (belts, shirts) saved lives before EMS arrived.
HOW TO APPLY A TOURNIQUET
Always call for help first (911 or equivalent). Use gloves if available; wash hands after. Lie the person down if possible.
General Steps (Commercial or DIY):
- Expose the wound – cut away clothing.
- Apply direct pressure first for 15 minutes with absorbent material. If fails:
- Place TQ 2-3 inches above wound, between wound and heart (never on joint or wound itself).
- Warn the person: “This will hurt, but it saves your life.”
- Tighten until bleeding stops – no pulse below TQ.
- Mark the time (write “T” and time on forehead or TQ).
- Don’t cover the TQ – keep it visible for medics.
- Don’t loosen or remove – only pros do that.
- If bleeding continues, add a second TQ above the first.
- Monitor for shock; keep warm. Commercial TQ (e.g., CAT or SOF-T):
- Strap it on, pull tight.
- Twist windlass rod until taut.
- Lock in clip.
- Quick (under 30 seconds with practice).
DIY OPTIONS IN SURVIVAL SITUATIONS
When no commercial TQ? Improvise – but they’re less reliable (up to 80% failure rate if done wrong). Use wide, strong materials to avoid cutting skin.
Materials:
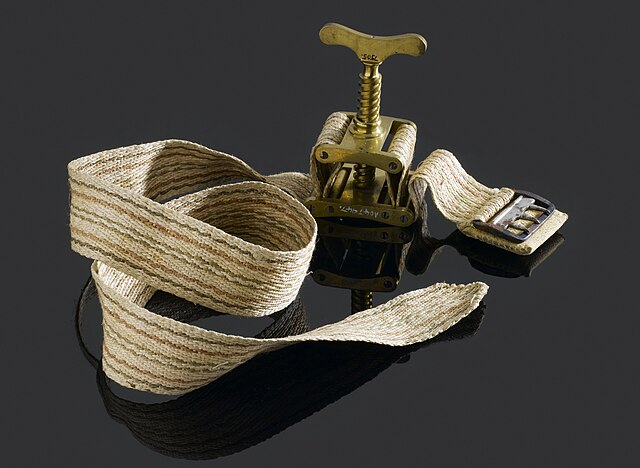
- Bandage: Triangular bandage, torn shirt strip, scarf, bandana (at least 2-4 inches wide; avoid slippery synthetics).
- Windlass: Stick, screwdriver, spoon handle, knife (sturdy, won’t break).
- Belts: Can work if wide leather and used with windlass – don’t just buckle; it won’t tighten enough alone.
- Other: Rope with stick, exercise band (not ideal), paracord with rod (wider is better). Avoid: Wire, zip ties, thin cords (cut into flesh), pencils/pens (snap), silk ties (slip).
How to Make and Apply:
- Fold/tie the bandage material around the limb above the wound (bare skin best).
- Tie a square knot (like shoelace without bow).
- Place windlass on top of knot; tie another knot over it to secure.
- Twist windlass to tighten – watch bleeding stop.
- Secure ends by tying to limb or tucking.
Examples:
- Belt + Stick: Loop belt, insert stick through loop, twist.
- Shirt Sleeve + Branch: Tear sleeve wide, use branch as windlass.
- Scarf + Tool: Ideal in urban survival; twist with multi-tool handle. Pro Tip: Practice on yourself (not fully tight) to learn – but in real scenarios, go high and tight.
TOURNIQUET VS. PRESSURE BANDAGE
People confuse these. Here’s the difference:
| Feature | Tourniquet | Pressure Bandage |
|---|---|---|
| Purpose | Stop all flow for massive bleeds | Control moderate bleeding with pressure |
| Placement | Above wound, tight enough for no pulse | Directly on wound |
| Tightness | Extreme – painful, stops artery | Firm but allows some circulation |
| Use When | Direct pressure fails | First line for most bleeds |
| Risk | Limb damage if >2 hours | Less risk, but ineffective for severe |
| DIY Ease | Moderate (needs windlass) | Easy (gauze + wrap) |
The Quick Tests:
- Bleeding type: Spurting = TQ; oozing = bandage.
- Control: Stops with pressure? No TQ needed.
- Limb: Yes for TQ; no for head/torso.
WARNINGS AND MYTHS
- Time Limit: Max 2 hours – longer risks nerve/muscle death, amputation.
- Pain: Expect screams; it’s normal.
- Failure Modes: Too loose = worse bleeding (blocks veins first); too narrow = tissue damage.
- Myths: “TQs always cause amputation” – false; data shows survival trumps risks. “Elevate only” – insufficient alone.
- Self-Application: Possible on leg; hard on arm (use teeth to twist).
- Aftercare: Get to hospital ASAP; medics will release gradually.
- Training: Take a Stop the Bleed course – free in many areas.
HARVESTING KNOWLEDGE (PREP TIPS)
When to Learn: Now – add a commercial TQ to your bug-out bag or car kit.
How: Practice on a dummy limb (rolled towel).
Storage: Keep clean, accessible; check expiration on commercial ones.
Why Prep: In wilderness survival, help might be hours away – a TQ bridges the gap.
CULTURAL SIGNIFICANCE
Military Icon: Standard in every soldier’s IFAK (Individual First Aid Kit).
Civilian Hero: Used in mass shootings, accidents – empowers bystanders.
Symbol: Resilience under pressure – literally.
FINAL THOUGHTS
A tourniquet isn’t fancy tech; it’s raw, effective intervention when blood won’t stop. It does one job: keep you alive long enough for rescue. In DIY survival, belts and sticks become lifesavers – but only if you know the why and how. Respect the risks, prioritize direct pressure, and train ahead. Misuse can harm, but inaction kills. Spot the signs, act fast, and remember: in bleeding emergencies, you’re the first responder. That’s worth everything.
For more on bleeding control, see Pressure Points in the First Aid Archive. For wound care, check Flora Archive for natural antiseptics like Yarrow or Fireweed poultice.